Here is a brief explanation about Java Web Start from SUN
“Java Web Start is a mechanism for program delivery through a standard Web server. Typically initiated through the browser, these programs are deployed to the client and executed outside the scope of the browser. Once deployed, the programs do not need to be downloaded again, and they can automatically download updates on startup without requiring the user to go through the whole installation process again.”
This tutorial shows you how to create a Java Web Start (Jnlp) file for user to download, when user click on the downloaded jnlp file, launch a simple AWT program. Here’s the summary steps :
- Create a simple AWT program and jar it as TestJnlp.jar
- Add keystore into TestJnlp.jar
- Create a Jnlp file
- Put all into Tomcat Folder
- Access TestJnlp.jar from web through http://localhost:8080/Test.Jnlp
Ok, let’s start
1. Install JDk and Tomcat
Install Java JDK/JRE version above 1.5 and Tomcat.
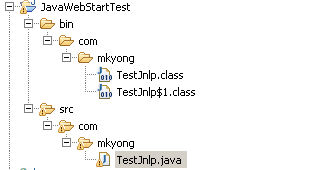
2. Directory Structure
Directory structure of this example.
3. AWT + Jnlp
See the content of
TestJnlp.java, it’s just a simple AWT program with AWT supported.package com.mkyong; import java.awt.*; import javax.swing.*; import java.net.*; import javax.jnlp.*; import java.awt.event.ActionListener; import java.awt.event.ActionEvent; public class TestJnlp { static BasicService basicService = null; public static void main(String args[]) { JFrame frame = new JFrame("Mkyong Jnlp UnOfficial Guide"); frame.setDefaultCloseOperation(JFrame.EXIT_ON_CLOSE); JLabel label = new JLabel(); Container content = frame.getContentPane(); content.add(label, BorderLayout.CENTER); String message = "Jnln Hello Word"; label.setText(message); try { basicService = (BasicService) ServiceManager.lookup("javax.jnlp.BasicService"); } catch (UnavailableServiceException e) { System.err.println("Lookup failed: " + e); } JButton button = new JButton("http://www.mkyong.com"); ActionListener listener = new ActionListener() { public void actionPerformed(ActionEvent actionEvent) { try { URL url = new URL(actionEvent.getActionCommand()); basicService.showDocument(url); } catch (MalformedURLException ignored) { } } }; button.addActionListener(listener); content.add(button, BorderLayout.SOUTH); frame.pack(); frame.show(); } }
P.S If “import javax.jnlp.*;” is not found, please include jnlp library which located at JRE/lib/javaws.jar.
4. Jar It
Located your Java’s classes folder and Jar it with following command in command prompt
jar -cf TestJnlp.jar *.*
This will packs all the Java’s classes into a new jar file, named “TestJnlp.jar“.
5. Create keystore
Add a new keystore named “testkeys”
keytool -genkey -keystore testKeys -alias jdc
It will ask for keystore password, first name, last name , organization’s unit…etc..just fill them all.
6. Assign keystore to Jar file
Attached newly keystore “testkeys” to your “TestJnlp.jar” file
jarsigner -keystore testKeys TestJnlp.jar jdc
It will ask password for your newly created keystore
7. Deploy JAR it
Copy your “TestJnlp.jar” to Tomcat’s default web server folder, for example, in Windows – C:\Program Files\Apache\Tomcat 6.0\webapps\ROOT.
8. Create JNLP file
Create a new Test.jnlp file like this
<?xml version="1.0" encoding="utf-8"?>
<jnlp spec="1.0+" codebase="http://localhost:8080/" href="Test.jnlp">
 <information>
  <title>Jnlp Testing</title>
  <vendor>YONG MOOK KIM</vendor>
  <homepage href="http://localhost:8080/" />
  <description>Testing Testing</description>
 </information>
 <security>
  <all-permissions/>
 </security>
 <resources>
  <j2se version="1.6+" />
  <jar href="TestJnlp.jar" />
 </resources>
 <application-desc main-class="com.mkyong.TestJnlp" />
</jnlp>
9. Deploy JNLP file
Copy Test.jnlp to your tomcat default web server folder also.
C:\Program Files\Apache\Tomcat 6.0\webapps\ROOT
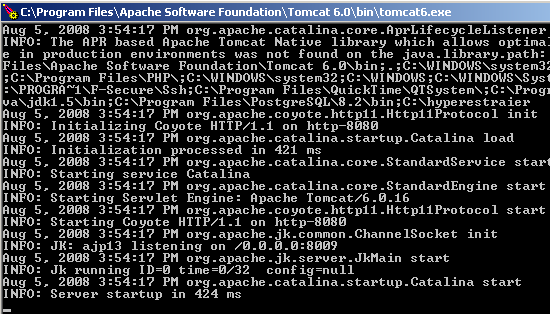
10. Start Tomcat
C:\Tomcat folder\bin\tomcat6.exe
11. Test it
Access URL http://localhost:8080/Test.jnlp, it will prompt you to download the Test.jnlp file, just accept and double click on it.
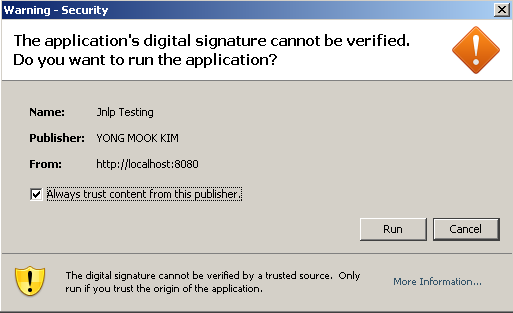
If everything went fine, you should see following output
Click on the “run” button to launch the AWT program.
Note
If jnlp has not response, puts following codes in your web.xml, which located in Tomcat conf folder.
If jnlp has not response, puts following codes in your web.xml, which located in Tomcat conf folder.
  <mime-mapping>
    <extension>jnlp</extension>
    <mime-type>application/x-java-jnlp-file</mime-type>
  </mime-mapping>


No comments:
Post a Comment